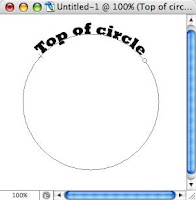

Take that Direct Select tool (sometimes called "path selection tool") and![]() hover at the origin point until you see the cursor with the black arrow.
hover at the origin point until you see the cursor with the black arrow.![]() Click and drag the type down.
Click and drag the type down.![]() Don't release the mouse until the text is where you want it.
Don't release the mouse until the text is where you want it.![]() Go ahead। Move it around. You'll see you can get all kinds of results just in the way you drag it.
Go ahead। Move it around. You'll see you can get all kinds of results just in the way you drag it. 

If a portion of the type goes beyond an anchor, you'll need to move that anchor. (See that dot? That's it!)![]() Release the mouse and move the cursor to the END of the type.
Release the mouse and move the cursor to the END of the type.![]() Drag away from the type and you'll see the rest of it appear.
Drag away from the type and you'll see the rest of it appear.
Now, you have type at the bottom of a circle.
At this point you can select the type and key in the legend for the bottom of your circle. This leaves us with a layer for the type on the top, and a layer with the type on the bottom.
Fine-tuning Circular Type & the layout
Your bottom type may have become scruntched. (Slang term for "squeezed together.") So you'll need to select it with the Text Tool, and on the Character Palette, adjust the letter spacing or Tracking.
I've had to go all the way to 100 because the slab serifs in the Rockwell font are very unforgiving. With some more rounded fonts you may not have as much of a problem.![]() Tip: Tracking adjusts Letter Spacing across a string of characters... not to be confused with Kerning which only affects the space between two characters!
Tip: Tracking adjusts Letter Spacing across a string of characters... not to be confused with Kerning which only affects the space between two characters!
![]()
To finish, you can use the Direct Select tool once again to shift, stretch and adjust the circles to fit your needs. In this simple example, I've had to slightly stretch the circle to get a better visual fit with the photo. Here, I'm adjusting the left anchor of the circle -- pulling it out for a better fit.
I use the "nudge" technique... .![]() Click once on an anchor point with the Direct Select pointer
Click once on an anchor point with the Direct Select pointer![]() Tap Arrow keys on the keyboard "Nudge" the anchor in the direction desired
Tap Arrow keys on the keyboard "Nudge" the anchor in the direction desired![]() Remember to count your taps on the arrow key. Use the same number of arrow-key-taps for the right side.
Remember to count your taps on the arrow key. Use the same number of arrow-key-taps for the right side.


Note that the path and anchors will move, leaving the type where it was. If you'll pause at the destination, the type will snap into position.


No comments:
Post a Comment